
 207
207
RealPage Accounting: Create an AP Invoice in Spend Management - for corporate or those using Spend Management (All Property employees, such as property managers, will use Site View and should refer to this article.)
Create AP Invoice
1. Go to the AP Invoice List or the Workbench to create an AP Invoice:
- From the top level, go to Spend Management > All > Search & Find > AP Invoice > Add
- From the top level, go to Spend Management > All > Workbench > Add > AP Invoice
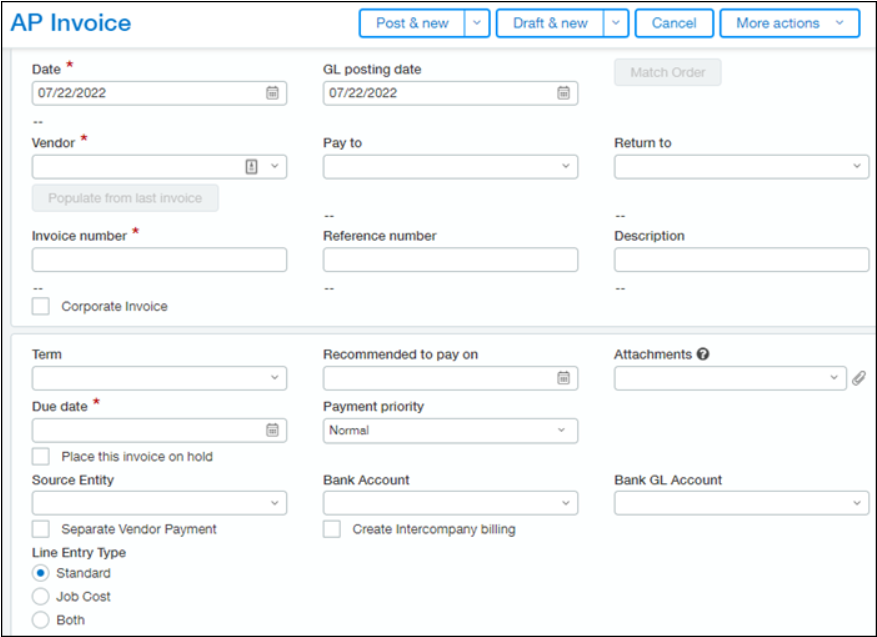
3. Enter the details of the invoice. The required fields are as follows:
- Date
- GL posting date
- Vendor
- Invoice number
- Due Date
- Account
- QTY
- Price
- Amount
- Location
- Memo
Create an AP Invoice from a Purchase Order
If Purchase Order approval is enabled, you can create an AP Invoice from a Purchase Order only after it is approved. For instructions to approve a Purchase Order, please see: RealPage Accounting: Approve or Decline Transactions in the Approval WorkbenchInvoices created from a Purchase Order are automatically matched.
Purchase Orders List
1. From the top level, go to Spend Management > All > Search & Find > Purchase Order

2. Locate the Purchase Order and click Create Invoice
3. Enter the details of the invoice. The required fields are as follows:
- Date
- GL posting date
- Invoice number
- Due Date
- Account
- QTY
- Price
- Amount
- Location
- Memo
Workbench
1. From the top level, go to Spend Management > All > Workbench

2. Select the Purchase Order radio button
3. Use the filters available on this page and click Apply to narrow down the transactions shown on the list. Some of the commonly used filters are as follows:
- From Date
- To Date
- Order #
- Vendor
- Property
4. Locate the Purchase Order and click Create Invoice
5. Enter the details of the invoice. The required fields are as follows:
- Date
- GL posting date
- Invoice number
- Due Date
6. Click Submit & new
Create an AP Invoice from a Service Contract
Invoices created from a Service contract are automatically matched.1. From the top level, go to Spend Management > All > Workbench

2. Select the Service Contract radio button
3. Use the filters available on this page and click Apply to narrow down the transactions shown on the list. Some of the commonly used filters are as follows:
- Show Service Contracts
- From Date
- To Date
- Service Contract #
- Vendor
- Property
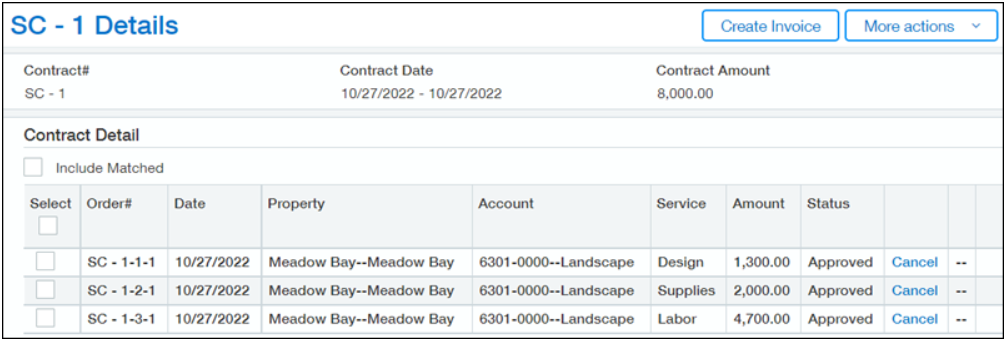
5. In the Contract Detail section, check the box before the Service Contract that needed an invoice
6. Click Create Invoice
7. Enter the details of the invoice. The required fields are as follows:
- Date
- GL posting date
- Invoice number
- Due Date
8. Click Submit & new
Create an AP Invoice from a Subcontract
1. From the top level, go to Spend Management > All > Workbench

2. Select the Subcontract radio button
3. Use the filters available on this page and click Apply to narrow down the transactions shown on the list. Some of the commonly used filters are as follows:
- Show Service Contracts
- From Date
- To Date
- Service Contract #
- Vendor
- Property
4. Locate the subcontract and click Create Invoice
5. Enter the details of the invoice. The required fields are as follows:
- Date
- GL posting date
- Invoice number
- Due Date
6. Click Submit & new
What Happens Next
The AP Invoices will appear in the Approval Workbench to be approved before you can pay them. For instructions to approve an AP Invoice, please see: RealPage Accounting: Approve or Decline Transactions in the Approval Workbench

